Deploying Your Rails App to AWS with Pulumi: Part 2
Supreet Singh - May 20, 2023
In the first part of this series, we set the stage for deploying a Rails application on AWS using Pulumi. We explored the benefits of our chosen trio (Rails, AWS and Pulumi) and prepared our development environment. Now, let's dive deeper into the application preparation process and explore more of what Pulumi has to offer.
AWS Services
If I could go back in time, I would have started with learning deeply about AWS services first. The great thing about services like Render is that they abstract away so many details that are required for an application to run. It took me a while to wrap my head around how AWS networking stack worked - VPC, subnets, security groups, etc. I would recommend reading up on these concepts before diving into Pulumi. As a matter of fact, I think it's a good idea to draw up your networking diagram before you start coding.
Here's the initial take for this project that I drew up:
This is a very simplistic take on setting up a networking stack.
- We have a VPC that allows HTTPS traffic from the internet to the load balancer.
- The load balancer forwards the traffic to the ECS cluster running on autoscalable EC2 instances. These are set up in private subnets.
- RDS is set up in a private subnet as well. The ECS cluster can access the database via the private subnet.
Gotchas
- Everything in AWS revolves around IAM. Always think about whether you have permissions to access / create a particular resource before working with it. There were so many times when I was stuck because I didn't have the right permissions set up from the get-go.
- NAT gateways are expensive. If you create private subnets, AWS will automatically add NAT gateways for your resources to access the internet. This can add up to a lot of money if you're not careful.
- Security groups are a pain but it's very important to learn how they work. Making your services talk to each other is a lot easier when you understand how security groups work.
Pulumi
To make things easier, I used Pulumi's Typescript SDK. My primary reasons were that I was already familiar with Typescript and since Typescript is very popular, there were a lot of resources on the web as well.
Pulumi has some great starter docs so I won't go into too much detail here. I'll just highlight some of the things that I found useful.
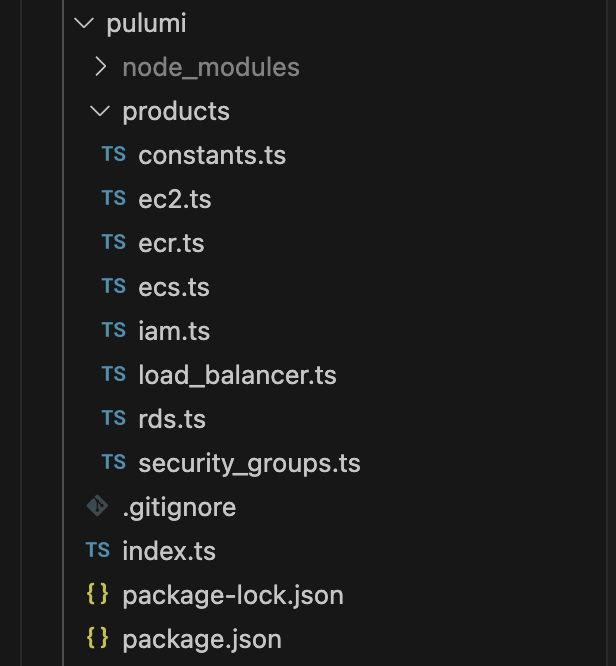
A lot of the tutorials online only use a single index.ts file. I found it helpful (for my own sanity) to split up the code by resources.

Here's a list of services I ended up using:
- IAM:
pulumi.aws.iamfor creating and access IAM roles - VPC:
pulumi.aws.ec2.Vpcfor creating a VPC. I created a public and private subnet with two availability zones. Also helpful to set NatGateways strategy to None here to avoid unnecessary costs. - SecurityGroup:
pulumi.aws.ec2.SecurityGroupfor creating security groups. I created a security group for the load balancer, ECS cluster, EC2 instances and RDS. - LoadBalancer:
pulumi.aws.lbfor creating an application load balancer. I created a public load balancer that forwards traffic to the ECS cluster. Also created a target group and listener to achieve that. - ACM:
pulumi.aws.acmfor creating an SSL certificate. I created a certificate for HTTPS traffic and attached it to the LB listener. - LaunchTemplate:
pulumi.aws.ec2.LaunchTemplatefor creating a launch template. I created a launch template for the EC2 instances that are part of the ECS cluster. This launch template was used by the Autoscaling group. - AutoscalingGroup:
pulumi.aws.autoscalingfor creating an autoscaling group. I created an autoscaling group that uses the launch template creates earlier. - ECS:
pulumi.aws.ecsto create theEcsClusterandEcsService. I also created aEcsTaskDefinitionthat is used by the service.CapacityProvideris used to make sure the service uses the autoscaling group. - ECR:
pulumi.aws.ecrto create a repository for the Docker image. I created a repository for the Rails app and this was consumed by ECS as defined in the container definition. - RDS:
pulumi.aws.rdsto create a database. I created a Postgres database in a private subnet. I also created a security group for the database and allowed access from the ECS cluster security group.
Gotchas
- To use an EC2 instance with ECS, we need to make sure we are using the right AMI as well as set the ECS cluster name as an environment variable
const ami = AwsEC2.getAmi({
  mostRecent: true,
  filters: [
    {
      name: "name",
      values: ["amzn2-ami-ecs-hvm-2.0.20220831-x86_64-ebs"],
    },
    {
      name: "virtualization-type",
      values: ["hvm"],
    },
  ],
  owners: ["..."],
});

const userData = `
#!/bin/bash
sudo bash
echo ECS_CLUSTER=${ECS_CLUSTER_NAME} >> /etc/ecs/ecs.config
`;

export const ec2LaunchTemplate = new AwsEC2.LaunchTemplate(
  "ms-ec2-launch-template",
  {
    imageId: ami.then((ubuntu) => ubuntu.id),
    instanceType: AwsEC2.InstanceType.T3_Small,
    userData: Buffer.from(userData, "binary").toString("base64"),
  }
);
- Pulumi Outputs gave me a lot of trouble. Since the resource creation is asynchronous, figuring out ways to wait for creation and then use the output was a bit tricky. There are quite a few ways to do this listed here.
Wrapping up Part 2
In the next post, we'll dig deeper into Pulumi and prepping our infrastructure for deployment.
Check out Part 3 here: Deploying Your Rails App to AWS with Pulumi: Part 3

